DIY Candle Making at Home with Ohcans
Crafting your own candles not only allows you to express your creativity but also brings a sense of warmth and tranquility to your home. So, let's dive into the exciting world of DIY candles and ignite your creativity!
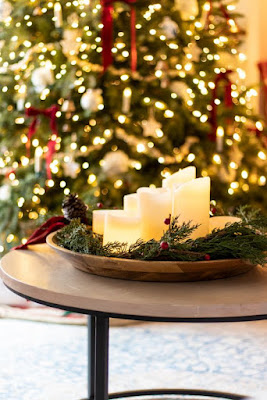
Experience the enchantment of Ohcans candles. Handcrafted with care, our premium candles infuse your space with captivating fragrances and a warm, soothing glow. Elevate every moment with the essence of Ohcans, where artistry and ambiance come together in harmony.
The Magic of DIY Candles:
There's something truly magical about the process of creating your candles. From selecting the perfect wax and fragrance to choosing unique containers and designing personalized labels, every step of the DIY candle-making journey is an opportunity to infuse your creations with your individuality and style. Whether you're a seasoned crafter or a first-time candle maker, DIY candles offer a sense of accomplishment and satisfaction that store-bought candles simply can't match.
 Gather Your Supplies:
To get started, gather your candle-making supplies. You'll need wax (such as soy wax or beeswax), wicks, fragrance oils or essential oils, coloring agents (if desired), containers, a pouring pot, a thermometer, and stirring utensils. Don't worry; most of these items are readily available at craft stores or online.
Selecting the Perfect Fragrance:
The fragrance of a candle sets the mood and ambiance in any space. With DIY candles, you have the freedom to experiment with an array of scents, from soothing lavender and invigorating citrus to warm vanilla and festive holiday aromas. Unleash your creativity and create custom scent combinations that resonate with your preferences and emotions.
Personalize Your Containers:
The beauty of DIY candles extends beyond the wax itself. Consider using unique containers like vintage teacups, mason jars, or repurposed glass containers to add a touch of elegance and uniqueness to your creations. Get crafty with ribbons, labels, or decorative charms to make each candle truly one-of-a-kind.
As we venture into the North American market, we invite you to embrace your creativity and embark on a DIY candle-making journey. From selecting the perfect fragrance to personalizing your containers, crafting candles at home allows you to infuse your space with warmth, love, and your unique touch. Whether you're seeking a relaxing hobby or looking to create thoughtful gifts for loved ones, DIY candles are the perfect avenue to express yourself and set the ambiance in your home. We can't wait to witness the beautiful creations you bring to life! Happy candle crafting!
Gather Your Supplies:
To get started, gather your candle-making supplies. You'll need wax (such as soy wax or beeswax), wicks, fragrance oils or essential oils, coloring agents (if desired), containers, a pouring pot, a thermometer, and stirring utensils. Don't worry; most of these items are readily available at craft stores or online.
Selecting the Perfect Fragrance:
The fragrance of a candle sets the mood and ambiance in any space. With DIY candles, you have the freedom to experiment with an array of scents, from soothing lavender and invigorating citrus to warm vanilla and festive holiday aromas. Unleash your creativity and create custom scent combinations that resonate with your preferences and emotions.
Personalize Your Containers:
The beauty of DIY candles extends beyond the wax itself. Consider using unique containers like vintage teacups, mason jars, or repurposed glass containers to add a touch of elegance and uniqueness to your creations. Get crafty with ribbons, labels, or decorative charms to make each candle truly one-of-a-kind.
As we venture into the North American market, we invite you to embrace your creativity and embark on a DIY candle-making journey. From selecting the perfect fragrance to personalizing your containers, crafting candles at home allows you to infuse your space with warmth, love, and your unique touch. Whether you're seeking a relaxing hobby or looking to create thoughtful gifts for loved ones, DIY candles are the perfect avenue to express yourself and set the ambiance in your home. We can't wait to witness the beautiful creations you bring to life! Happy candle crafting!
 Step 1: Gather Your Supplies
Before you begin, gather all the necessary supplies for candle making. You'll need:
Wax (Soy wax, beeswax, or paraffin wax)
Candle wicks
Fragrance oils or essential oils (optional)
Coloring agents (optional)
Candle containers (glass jars, tins, or molds)
Double boiler or a heat-resistant pouring pot
Thermometer
Stirring utensil (a wooden spoon or popsicle stick works well)
Wick stickers or glue dots (if using container wicks)
Wick holders (if using mold wicks)
Scissors
Newspaper or wax paper (to protect your workspace)
Step 2: Prepare Your Workstation
Cover your workspace with newspaper or wax paper to protect it from any potential spills or wax drips. Set up your double boiler or pouring pot on the stove and prepare the candle containers by cleaning them and placing wicks in the center (use wick stickers or glue dots to secure them to the bottom of the container).
Step 3: Melt the Wax
Fill the bottom of the double boiler or pouring pot with water and place it on the stove over medium heat. Add the wax to the top part of the double boiler or pouring pot. Stir occasionally until the wax melts completely. Use a thermometer to monitor the temperature; the optimal melting temperature varies based on the type of wax you're using.
Step 4: Add Fragrance and Color (Optional)
Once the wax is melted, you can add fragrance oils or essential oils to give your candles a delightful aroma. If you want to add color, mix in coloring agents according to the manufacturer's instructions. Remember that a little goes a long way with coloring agents, so add a small amount at a time until you achieve your desired hue.
Step 5: Pour the Wax
Carefully pour the melted wax into the prepared candle containers. Hold the wick in place with a wick holder (for mold wicks) or gently center it with a wick sticker or glue dot (for container wicks). Leave some space at the top of the container to avoid overflow when the wax cools.
Step 6: Let the Candles Cool
Allow the candles to cool and solidify completely. This process may take a few hours, depending on the size of the candles and the type of wax used.
Step 7: Trim the Wicks
Once the candles have cooled and solidified, trim the wicks to about ¼ inch above the wax surface. This helps ensure a clean and even burn when you light the candles.
Step 8: Enjoy Your Handmade Candles
Step 1: Gather Your Supplies
Before you begin, gather all the necessary supplies for candle making. You'll need:
Wax (Soy wax, beeswax, or paraffin wax)
Candle wicks
Fragrance oils or essential oils (optional)
Coloring agents (optional)
Candle containers (glass jars, tins, or molds)
Double boiler or a heat-resistant pouring pot
Thermometer
Stirring utensil (a wooden spoon or popsicle stick works well)
Wick stickers or glue dots (if using container wicks)
Wick holders (if using mold wicks)
Scissors
Newspaper or wax paper (to protect your workspace)
Step 2: Prepare Your Workstation
Cover your workspace with newspaper or wax paper to protect it from any potential spills or wax drips. Set up your double boiler or pouring pot on the stove and prepare the candle containers by cleaning them and placing wicks in the center (use wick stickers or glue dots to secure them to the bottom of the container).
Step 3: Melt the Wax
Fill the bottom of the double boiler or pouring pot with water and place it on the stove over medium heat. Add the wax to the top part of the double boiler or pouring pot. Stir occasionally until the wax melts completely. Use a thermometer to monitor the temperature; the optimal melting temperature varies based on the type of wax you're using.
Step 4: Add Fragrance and Color (Optional)
Once the wax is melted, you can add fragrance oils or essential oils to give your candles a delightful aroma. If you want to add color, mix in coloring agents according to the manufacturer's instructions. Remember that a little goes a long way with coloring agents, so add a small amount at a time until you achieve your desired hue.
Step 5: Pour the Wax
Carefully pour the melted wax into the prepared candle containers. Hold the wick in place with a wick holder (for mold wicks) or gently center it with a wick sticker or glue dot (for container wicks). Leave some space at the top of the container to avoid overflow when the wax cools.
Step 6: Let the Candles Cool
Allow the candles to cool and solidify completely. This process may take a few hours, depending on the size of the candles and the type of wax used.
Step 7: Trim the Wicks
Once the candles have cooled and solidified, trim the wicks to about ¼ inch above the wax surface. This helps ensure a clean and even burn when you light the candles.
Step 8: Enjoy Your Handmade Candles
 Congratulations! Your homemade candles are now ready to be enjoyed. Light them up and bask in the warm glow and delightful fragrance that you've created with your own hands.
If you wish to purchase an unique and ecofriendly candle, please check out Ohcans here:https://ohcans.com/
Congratulations! Your homemade candles are now ready to be enjoyed. Light them up and bask in the warm glow and delightful fragrance that you've created with your own hands.
If you wish to purchase an unique and ecofriendly candle, please check out Ohcans here:https://ohcans.com/
 Attention! invite fresh scent to your home space, if you happen to be an influencer with over 50 followers on a social media platform, you have our sincere initation. You will receive free products from us, if you can use your user experience on your social platform for us. Simply reach out to us on our website.


Comments
Post a Comment