DIY Guide: How to Make Your Own Candle with Natural Candle Wax
In today's fast-paced world, taking a moment to unwind and relax is crucial for our well-being. Candles can create a soothing ambiance and add warmth to any space. However, many commercially available candles contain synthetic materials that can release harmful chemicals when burned. To ensure a healthier and more eco-friendly option, why not make your own candle using natural candle wax? In this step-by-step guide, we will show you how to craft your very own natural candle.
Step 1: Gather Your Supplies
To make a natural candle, you'll need the following supplies:
Natural candle wax (such as soy wax, beeswax, or coconut wax)
Candle wicks
Essential oils or fragrance oils (optional)
Heat-resistant container or mold (glass jars work well)
Double boiler or a heat-resistant container and a larger pot
Thermometer
Stirring utensil (wooden or metal)
Clothespin or wick holder
 Step 2: Prepare Your Work Area
Before you begin, set up a clean and organized workspace. Cover the area with newspapers or a plastic sheet to catch any spills or drips. This will make DIY candle making a smooth process.
Step 3: Melt the Wax
Using the double boiler method, place the natural candle wax in the top container or a heat-resistant container and set it inside a larger pot filled with water. Heat the water gently on a stove until the wax melts completely. Use a thermometer to monitor the temperature, ensuring it doesn't exceed the recommended melting point for your chosen wax.
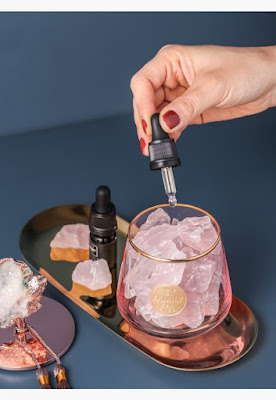
Step 4: Add Fragrance (Optional)
If desired, you can add a pleasant aroma to your candle by incorporating essential oils or fragrance oils. Stir in the chosen fragrance using the wooden or metal utensil, making sure it's evenly distributed throughout the melted wax. Be cautious not to use too much fragrance, as it can interfere with the candle's burning performance.
Step 2: Prepare Your Work Area
Before you begin, set up a clean and organized workspace. Cover the area with newspapers or a plastic sheet to catch any spills or drips. This will make DIY candle making a smooth process.
Step 3: Melt the Wax
Using the double boiler method, place the natural candle wax in the top container or a heat-resistant container and set it inside a larger pot filled with water. Heat the water gently on a stove until the wax melts completely. Use a thermometer to monitor the temperature, ensuring it doesn't exceed the recommended melting point for your chosen wax.
Step 4: Add Fragrance (Optional)
If desired, you can add a pleasant aroma to your candle by incorporating essential oils or fragrance oils. Stir in the chosen fragrance using the wooden or metal utensil, making sure it's evenly distributed throughout the melted wax. Be cautious not to use too much fragrance, as it can interfere with the candle's burning performance.
 Step 5 :Prepare the Container and Wick
While the wax is melting, prepare the container by securing the wick in the center. You can do this by placing a small amount of melted wax at the bottom of the container and pressing the metal tab of the wick into it. Use a clothespin or wick holder to keep the wick centered and upright.
Step 6: Pour the Wax
Carefully pour the melted wax into the prepared container, ensuring the wick remains centered. Leave a small space at the top to avoid overflow when the candle solidifies. Allow the candle to cool and solidify for several hours.
Step 7: Trim the Wick and Enjoy
Once the candle has completely solidified, trim the wick to approximately ¼ inch (0.6 cm) in length. This will help the candle burn evenly and prevent excessive smoke. Now, light your handmade natural candle, sit back, and enjoy the warm and inviting atmosphere.
Step 5 :Prepare the Container and Wick
While the wax is melting, prepare the container by securing the wick in the center. You can do this by placing a small amount of melted wax at the bottom of the container and pressing the metal tab of the wick into it. Use a clothespin or wick holder to keep the wick centered and upright.
Step 6: Pour the Wax
Carefully pour the melted wax into the prepared container, ensuring the wick remains centered. Leave a small space at the top to avoid overflow when the candle solidifies. Allow the candle to cool and solidify for several hours.
Step 7: Trim the Wick and Enjoy
Once the candle has completely solidified, trim the wick to approximately ¼ inch (0.6 cm) in length. This will help the candle burn evenly and prevent excessive smoke. Now, light your handmade natural candle, sit back, and enjoy the warm and inviting atmosphere.
 Creating your own natural candle can be a fulfilling and rewarding experience. By using natural candle wax, you can ensure a healthier and eco-friendly alternative to store-bought candles. Follow this DIY guide, and you'll be able to enjoy the gentle glow and soothing scents of your very own handmade candles. So, why not embark on this creative journey and add a touch of tranquility to your home?


Comments
Post a Comment